
Computer Laptop Stickers Guide
Every developer’s stickered laptop started with a first sticker.
Somewhere along the way, at a conference, in a sticker pack someone gifted them, browsing an online shop at midnight, they found the first one. They peeled the backing. They pressed it down. And they looked at their laptop afterward and thought: yeah, that’s more like it.
If you haven’t had that moment yet, this guide is for you.
Computer laptop stickers can feel surprisingly intimidating when you’re starting from zero. Which stickers should go first? How do you apply them without ruining your laptop? What if you pick the wrong ones and regret it? How do you make the layout look intentional rather than random? And where do you even buy good ones?
These are all completely valid questions, and they all have clear, practical answers that nobody ever bothered to write down in one place for people who are just getting started.
That changes right now. This is the complete beginner’s guide to computer laptop stickers, everything you need to go from blank lid to a personalized developer setup you’re genuinely proud of, without making the mistakes that more experienced sticker collectors learned the hard way.
By the end of this post, you’ll know exactly what to buy, where to buy it, how to apply it safely, how to plan a layout that looks great, and how to avoid every common beginner pitfall in the book. You’ll also know how this fits into the bigger world of developer sticker culture, and where to go next as your collection grows.
Let’s start at the very beginning.
Why Developers Put Stickers on Their Laptops – The Culture Explained
You’re Joining a Tradition, Not Just Decorating Hardware
Before we get into the practical how-to, it helps to understand why this tradition exists. Because laptop stickers aren’t just decoration, they’re a form of communication that has real meaning in developer culture.
The practice traces back to the open-source movement of the 1980s and 1990s, when software projects started distributing stickers as community membership badges. If you contributed to a project, used their software, or attended their conference, you got a sticker. Putting that sticker on your laptop was a declaration: I’m part of this community. I use these tools. I was at that event.
That tradition has expanded enormously over the decades. Today, developer laptop stickers communicate:
Your technical stack – The languages you write, the frameworks you use, the tools you depend on every day. A Python logo tells fellow Python developers you’re one of them before you say a word.
Your community memberships – Open-source projects you contribute to, conferences you’ve attended, communities you’re active in. These are the hardest stickers to acquire and often the most meaningful.
Your sense of humor – The coding jokes, the relatable developer experiences captured in sticker form, the inside references that make non-developers confused and fellow developers laugh out loud.
Your aesthetic – Whether you prefer clean minimalism, maximalist chaos, retro nostalgia, or modern tech art, your sticker choices communicate something about how you see yourself and your relationship with your craft.
Understanding this helps you make better choices when you’re starting out. The best sticker collections aren’t random, they’re authentic expressions of real identity, real community, and real experience.
The Beginner’s Advantage
Here’s something that doesn’t get said enough: starting fresh gives you an advantage. You get to make deliberate, thoughtful choices about what goes on your lid from the very beginning. Veteran developers sometimes look at their laptops and wish they could start over, they made impulsive choices early on that they’re now stuck with, or their early stickers clashed with everything they added later.
You don’t have that problem yet. You have a blank canvas and the knowledge to use it well. That’s a better starting position than most.
Step 1: Understanding What Makes a Good Laptop Sticker
The Four Non-Negotiables for Beginners
Before you buy a single sticker, you need to know what to look for. These four qualities separate a sticker that will serve you well from one that will disappoint you within weeks:
Quality 1: Vinyl material, not paper
This is the most important distinction you’ll ever learn about stickers. Vinyl stickers are waterproof, durable, UV-resistant, and designed to last for years. Paper stickers, the kind you find in cheap bulk packs, deteriorate within months. Their edges lift, their colors fade, and when you try to remove them they leave messy adhesive residue that’s difficult to clean.
Every sticker you put on a laptop you care about should be vinyl. Specifically, look for “die-cut vinyl” or “weatherproof vinyl”, these terms consistently indicate quality. If a sticker listing doesn’t mention material at all, that’s a red flag.
Quality 2: Pressure-sensitive adhesive
Good laptop stickers use pressure-sensitive adhesive, a class of adhesive that bonds through physical pressure rather than chemical reaction. This type of adhesive creates a strong bond that holds well under daily use but releases cleanly when you remove the sticker correctly. Stickers with permanent or overly aggressive adhesive bond too strongly and can damage surfaces during removal.
Look for stickers described as “clean removal” or “repositionable” if you’re uncertain about a surface or know you’ll want to change your layout eventually.
Quality 3: A laminate coating over the design
Quality vinyl stickers have a transparent laminate layer over the printed surface that protects the design from scratching, UV fading, and moisture. This coating also adds structural integrity that makes the sticker easier to remove in one piece when the time comes. Without a laminate, the ink is exposed directly to the environment and degrades much faster.
Quality 4: Appropriate size for your laptop
Sticker size relative to your laptop lid matters more than most beginners expect. A sticker that looks perfect at full size in a product photo can look tiny and lost on a 15-inch laptop lid, or overwhelmingly large on a 13-inch machine. We’ll cover sizing in detail in the layout section, but as a starting rule: most laptop stickers work best in the 2–4 inch range for a standard laptop.
Step 2: Choosing Your First Stickers
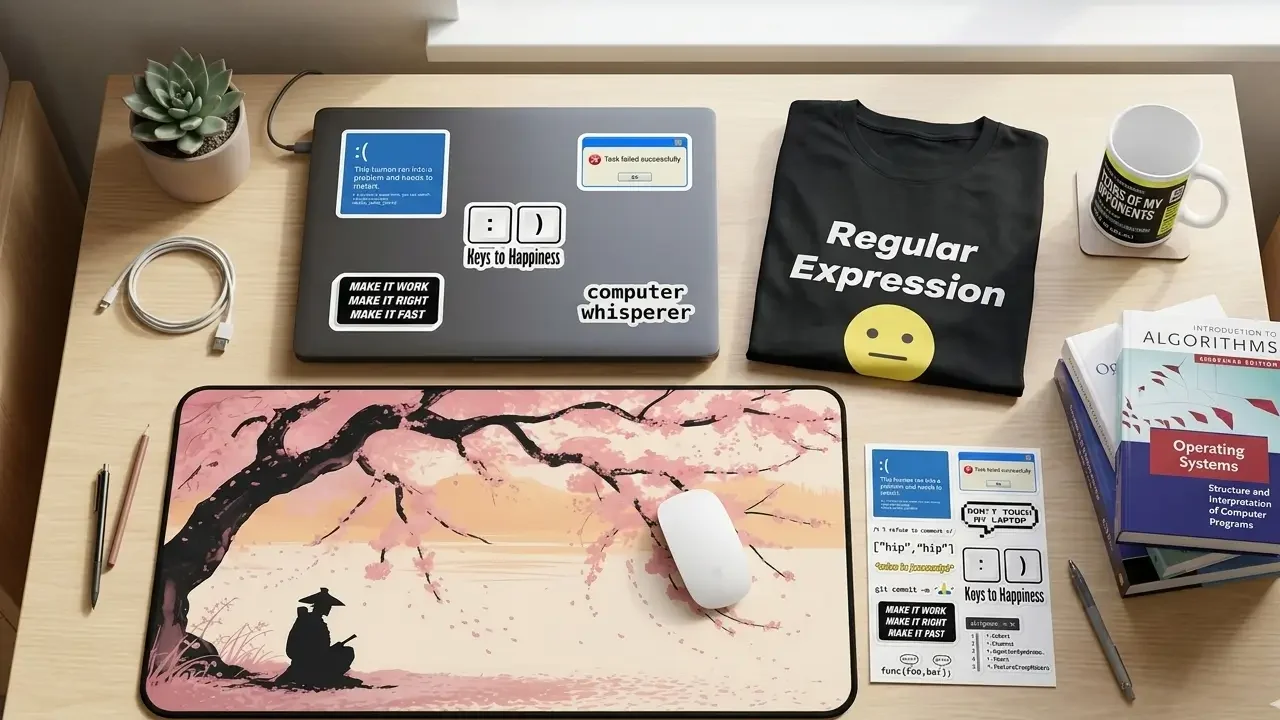
The Beginner’s Starter Kit – Start With Three
The most common beginner mistake is buying too many stickers at once and then feeling overwhelmed about placement, or worse, applying them all hastily and ending up with a chaotic lid that doesn’t reflect any intentional aesthetic.
The better approach: start with three stickers. Just three. This forces you to be deliberate about your initial choices and gives you a strong foundation to build on gradually.
Here’s the framework for choosing those three:
Sticker 1: Your Primary Programming Language Logo
Whatever language you write most often, Python, JavaScript, TypeScript, Rust, Go, Java, C++, Ruby, Swift, Kotlin, find a quality die-cut vinyl version of its logo and make this your first sticker. It’s the most authentic possible starting point because it represents what you actually do.
Language logos are also the most universally recognized stickers in developer culture. Every developer who sees your Python sticker knows immediately what it means. That instant recognition is valuable both socially and aesthetically.
If you write in multiple languages and can’t choose one, pick the one you’re most passionate about, not necessarily the one you use most for work, but the one that genuinely excites you. Passion is more authentic than frequency.
Sticker 2: A Developer Humor Sticker That Genuinely Makes You Laugh
This is where personality enters the picture. Pick one humor sticker, and pick one that you actually find funny, not one you think developers are supposed to find funny.
The classics work for a reason: “It works on my machine,” “There’s no place like 127.0.0.1,” “Hello, World,” “// TODO: fix this later”, these have become iconic because they capture something universally true about the developer experience. But if there’s a more specific joke that resonates with your particular experience, go with that instead.
The test for a humor sticker is simple: does it make you smile every time you look at it? If yes, it belongs on your laptop. If you’re choosing it because you think you should find it funny, it doesn’t.
TechGeeksApparel’s programmer sticker packs are built around exactly this kind of authentic developer humor, role-specific, technically accurate, and genuinely funny to developers who’ve lived the experiences the jokes reference.
Sticker 3: A Tool, Framework, or Community Badge
Your third starter sticker should represent something you use or belong to beyond your primary language. This could be a framework (React, Vue, Django, Rails), a tool (Git, Docker, Linux), an open-source project you contribute to, or a community you’re part of.
This third sticker adds depth to the story your lid tells. Language + humor + community gives you a foundation that communicates technical identity, personality, and belonging simultaneously, which is exactly what the best developer sticker collections do.
Where to Buy Your First Stickers
As a beginner, you want to buy from sources with consistent quality and clear material specifications. Getting burned by cheap paper stickers on your first purchase is discouraging and puts you off the whole experience.
Recommended starting points:
Specialist developer gear stores – Shops that focus specifically on developer culture understand what quality is needed for laptop use and curate their stock accordingly. TechGeeksApparel’s programmer sticker collection is purpose-built for developers, weatherproof vinyl, authentic developer humor, role-specific packs that give you a curated set rather than forcing you to make individual decisions.
Official project stores – For language and framework logos, going directly to the official project source (Python Software Foundation, Rust Foundation, etc.) ensures you get authentic, quality versions.
Etsy with careful vetting – Great for unique designs, but read reviews carefully and specifically look for mentions of print durability and material quality before buying from a new shop.
For the complete sourcing breakdown across every platform and price range, our guide on where to get the best laptop stickers covers everything you need to know as you explore beyond these starting points.
Step 3: Planning Your Layout
Why Planning Matters More Than Beginners Expect
The difference between a laptop lid that looks deliberately curated and one that looks like random decoration is almost entirely about layout planning. The same stickers, applied with thought versus applied impulsively, produce dramatically different results.
The good news: planning a layout takes about fifteen minutes and requires nothing more than a flat surface, your stickers, and a phone camera.
The Anchor-First Method
This is the most reliable layout planning technique for beginners and it works every time:
Find your anchor sticker. Your anchor is your largest, most visually significant sticker, usually your primary language logo or your favorite design. This is the sticker everything else will relate to in your layout. It sets the visual center of gravity for the entire lid.
Place the anchor in a strong position. Strong positions on a laptop lid are: slightly off-center (more interesting than dead center), the upper third of the lid (creates visual balance with the logo area many laptops have at the bottom), or anywhere that creates a pleasing relationship with the natural proportions of the lid. Avoid placing it so close to any edge that it feels precarious.
Build outward from the anchor. Place your remaining starting stickers in positions that feel visually balanced relative to the anchor. You’re not trying to create perfect symmetry, some asymmetry creates visual interest. But the overall composition should feel balanced when you step back and look at it.
Leave deliberate negative space. This is the most counterintuitive advice for beginners: don’t fill every inch of your lid. Negative space, areas of the lid with no stickers, gives each sticker room to breathe and makes the overall layout look intentional. A lid with 50–70% sticker coverage almost always looks better than one that’s completely covered.
Photograph before you commit. Once you’ve arranged your stickers on a flat surface in the layout you’re planning, photograph it. Look at the photo critically. Does it look balanced? Is there room to add more stickers later? Does each sticker have enough visual breathing room? Only proceed when you’re happy with what you see in the photo.
Beginner Layout Principles to Follow
Vary sticker sizes. A layout where all stickers are the same size looks monotonous. Mix larger anchor pieces with medium supporting stickers and smaller accent stickers for visual rhythm.
Mind the edges. Stickers placed too close to the edge of the lid are prone to lifting from the daily friction of the laptop going in and out of a bag. Keep stickers at least half an inch from all edges.
Consider the direction each sticker faces. Most stickers are designed to be read right-side up, and having all your text stickers oriented correctly relative to each other creates visual coherence. Think about where someone sitting across from you would see your stickers, you might want your funniest sticker to be readable in that orientation.
Group related stickers loosely. Language logos near each other, tool stickers clustered loosely, loose thematic grouping creates visual organization without rigidity.
Plan for growth. Your first three stickers are just the beginning. Leave obvious spaces in your layout where future stickers could naturally fit. This prevents you from painting yourself into a corner where adding new stickers later requires rethinking everything.
Step 4: Safe Application – The Complete Beginner Process

Surface Preparation – The Step Everyone Skips
Surface preparation is the single most skipped step in sticker application and the single biggest cause of early edge-lifting and adhesion failures. Before you apply anything, your laptop lid needs to be completely clean and dry.
Step 1: Dry wipe. Use a clean microfiber cloth to wipe the entire lid surface, removing any loose dust or debris.
Step 2: Alcohol wipe. Dampen a second microfiber cloth with 70%+ isopropyl alcohol, available at any pharmacy, and wipe thoroughly over the areas where stickers will go. This removes invisible skin oils, fingerprints, and manufacturing residues that compromise adhesion.
Step 3: Wait. Let the surface dry completely for at least five minutes. Isopropyl alcohol evaporates quickly, but you want it fully gone before sticker contact.
This three-step preparation process takes about five minutes and dramatically improves how well stickers bond to the surface and how cleanly they eventually come off.
The Application Process
With your surface clean and your layout photographed and confirmed, here’s the complete application process:
Check the position of your laptop. Make sure the laptop is on a flat, stable surface with the lid fully open. You want a stable platform to press against.
Identify the vent-free zones. Before applying anything, confirm that your planned sticker positions are on the lid itself and not on any part of the machine with ventilation slots. The display lid is almost always vent-free, that’s your safe zone. For more on this, our guide on are stickers safe for laptops covers everything you need to know about keeping your laptop’s thermal design intact.
Start with your anchor sticker. Peel the backing paper from your anchor sticker, holding the sticker by its edges to avoid touching the adhesive surface with your fingers. Position it above the lid, don’t let it make contact yet, and confirm the exact placement you want.
Lower carefully and press from center. Lower the sticker onto the surface from the center point first, then use your thumb or a credit card to press outward toward the edges, working out any air bubbles as you go.
Edge pressing. Once the sticker is fully down, give special attention to pressing all edges firmly. Edge adhesion determines long-term durability, stickers peel from the edges first.
Apply remaining stickers. Work outward from the anchor, applying each sticker with the same center-first, outward-pressing technique.
Final press. Once all stickers are applied, do a final pass pressing firmly on every sticker one more time, paying special attention to edges and corners.
Allow curing time. Leave the laptop undisturbed for at least an hour. Adhesive continues bonding during this initial period and strengthens significantly in the first 24 hours.
Step 5: Developing Your Theme Over Time
From Three Stickers to a Full Collection
Your first three stickers are a foundation, not a finished product. The best developer laptop collections evolve gradually over time, picking up new pieces at conferences, through community involvement, through deliberate shopping, and through organic discovery.
Here’s how to develop your theme thoughtfully as your collection grows:
Identify what your first three stickers have in common – After you’ve applied your starter kit and lived with it for a few weeks, look at what you chose and identify the common thread. Is it a color palette? A humor style? A technical focus? That common thread is your emerging aesthetic, lean into it as you add more stickers.
Add one category at a time – Rather than buying ten new stickers at once, add one or two at a time and live with each addition before making the next one. This pacing keeps your layout feeling considered rather than rushed.
Follow the 80/20 rule – 80% of your stickers should be genuinely meaningful to you, things you actually use, communities you actually belong to, jokes that actually make you laugh. 20% can be purely aesthetic, designs that look great and complement your layout without necessarily having deep personal meaning.
Let community participation drive acquisition – The most meaningful stickers come from doing things: attending events, contributing to projects, joining communities. As you participate more deeply in developer culture, the rare and significant stickers accumulate naturally as byproducts of that participation.
Common Beginner Themes That Work Well
If you’re not sure what direction to take your collection, here are beginner-friendly theme directions that consistently produce great results:
“My actual stack” – Every sticker represents something you genuinely use professionally. Pure authenticity, easy to curate, instantly readable by fellow developers. The cleanest possible starting point.
“Python and friends” – Python logo as anchor, Django or Flask framework badge, data science tool logos (Pandas, NumPy, Jupyter), a few Python community humor pieces. Works beautifully for data scientists, ML engineers, and web developers in the Python ecosystem.
“Full-stack web developer” – HTML/CSS joke stickers, JavaScript and TypeScript logos, React or Vue badge, Git and Docker tools, one or two web development humor pieces. Communicates the complete web developer identity clearly.
“Minimalist one-color” – All stickers in a single color palette, all black and white, or all shades of a single accent color. Unusual and striking, works especially well on silver or aluminum laptop lids.
“Vintage computing fan” – Retro tech art, floppy disk humor, CRT aesthetics, old terminal references. A cohesive nostalgia theme that looks great and generates conversations with developers of any generation.
For more theme inspiration and 50+ specific design ideas organized by category, our complete post on laptop sticker ideas for programmers is exactly where to go next after reading this guide.
Step 6: Common Beginner Mistakes and How to Avoid Them
The Mistakes That Experienced Developers Wish They’d Known About
These are the errors that come up consistently when experienced developers reflect on their early sticker choices. Knowing them in advance saves you from learning them the hard way:
Mistake 1: Buying cheap paper stickers to “try it out”
The logic makes sense, try cheap ones first to see if you like it. The reality: cheap paper stickers deliver a bad experience that puts you off sticker culture before you’ve actually experienced quality vinyl. They fade, peel, and leave residue. They also look noticeably worse from day one. Don’t do this. Start with quality vinyl from the beginning.
Mistake 2: Applying stickers to a dirty surface
Skipping the isopropyl alcohol wipe results in stickers that lift at the edges within days. The oils from your hands alone are enough to prevent proper adhesion at the contact points. Always prep the surface. Always.
Mistake 3: Covering ventilation
The one genuinely dangerous mistake. Check where your laptop vents are before applying anything. The lid is almost always safe, but always verify your specific model. Our guide on are stickers safe for laptops has the complete guidance on vent locations and thermal safety.
Mistake 4: Going too big too fast
Buying 30 stickers and applying them all at once results in a chaotic layout that’s hard to recover from. Start with three. Add gradually. Let the collection breathe.
Mistake 5: Choosing stickers you think you should like instead of ones you actually like
This is subtle but important. Developer sticker culture has its canonical designs, the classics everyone has. But if you don’t actually find “git push -force” funny, don’t put it on your laptop. Authenticity beats conformity in sticker culture every time.
Mistake 6: Ignoring size proportions
A 1-inch sticker on a 15-inch laptop lid disappears. A 6-inch sticker dominates everything around it. Check product dimensions carefully before ordering, and visualize how each sticker will look at actual size on your actual laptop before buying.
Mistake 7: Forgetting to plan for removal
Stickers are not forever, tastes change, laptops change, opinions about tools change. Using quality vinyl with clean-removal adhesive from the beginning means your options remain open. Cheap stickers with aggressive adhesive backs you into a corner.
Mistake 8: Applying stickers when the laptop is cold
Cold surfaces compromise adhesive activation. Room temperature or slightly warm surfaces produce the best adhesion. If your laptop has been in a cold bag or car, give it 15–20 minutes to reach room temperature before applying stickers.
Step 7: Maintenance and Long-Term Care
Keeping Your Sticker Collection Looking Great
A well-maintained sticker collection stays looking sharp for years. Here’s what long-term care looks like:
Clean gently and regularly. When cleaning your laptop lid, use a slightly damp microfiber cloth over the sticker surface, the laminate on quality vinyl stickers protects them from moisture. Avoid spraying any cleaner directly onto the sticker surface; spray onto the cloth first.
Address lifting edges immediately. If a sticker edge starts to lift, address it immediately rather than letting it worsen. A small amount of clear craft adhesive on the lifted edge, pressed firmly and held for 30 seconds, usually reseats it effectively.
Keep heat and direct sunlight in mind. Extended direct sun exposure, particularly leaving a laptop in a sunny car, can affect sticker adhesive over time. It’s not a daily concern, but it’s worth knowing.
Periodically reassess your layout. As your skills, interests, and community memberships evolve, your sticker collection should evolve with them. Removing stickers that no longer represent you and replacing them with more current ones keeps your lid authentic rather than a fossil record of who you used to be.
Taking Your First Steps – Where to Go From Here
Your Action Plan After Reading This Guide
You now have everything you need to start your developer sticker journey correctly. Here’s the specific action plan:
This week: Choose your first three stickers using the framework in Step 2. Order from a quality source, TechGeeksApparel’s programmer sticker packs for developer humor pieces, official project stores for language logos.
When they arrive: Follow the surface preparation and application process in Step 4 exactly. Take your time. Do it once and do it right.
Over the next month: Live with your three-sticker foundation. Notice how it feels. What’s missing? What would you add next? Let the answer inform your next purchase.
Ongoing: Participate in developer communities, attend events when you can, contribute to open-source projects. Let the rare and meaningful stickers accumulate naturally as byproducts of genuine community involvement.
For everything that comes next, more design ideas, sourcing options, specific guidance for your laptop model, professional appropriateness questions, the rest of this content cluster has you covered:
- Our post on developer laptop stickers and the 25 most popular designs shows you what the most culturally significant stickers in tech look like and why they matter
- The guide on are laptop stickers unprofessional answers every workplace and professional context question you might have
- Our post on tech laptop stickers and 40+ technology-themed designs covers the aesthetic end of the spectrum in depth
- And the coolest and rarest laptop stickers guide shows you where this hobby can go when you’re ready to chase the genuinely rare pieces
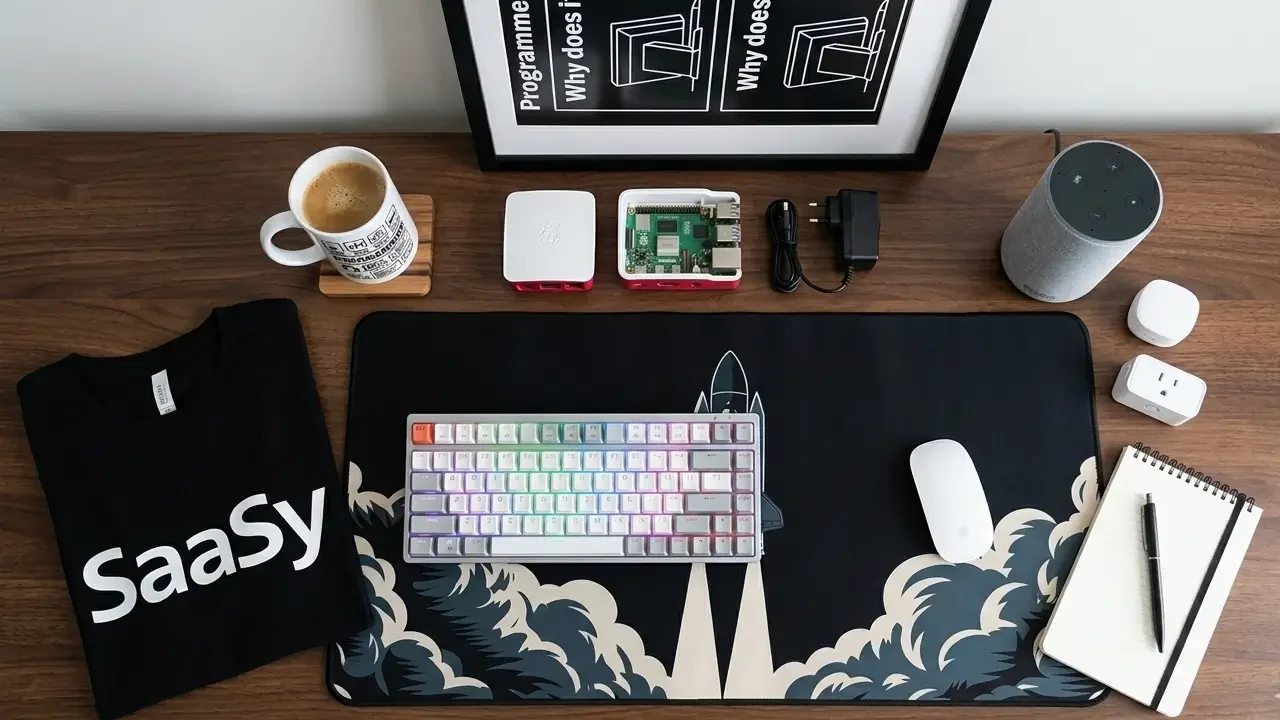
Complete Your Developer Setup Beyond the Laptop Lid
Your stickered laptop is the centerpiece of your developer identity, but it doesn’t have to stand alone.
TechGeeksApparel builds the rest of your developer aesthetic with the same intentionality that goes into a great sticker collection. Their funny programmer t-shirts carry the same authentic developer humor as your best stickers, perfect for tech meetups, hackathons, and casual Fridays at the office. The developer hoodies and cozy geek sweatshirts are built for the long coding sessions that every serious developer knows well.
Round out your workspace with a developer desk mat that covers your full keyboard and mouse area and sets the tone for your entire battlestation. Add a funny programmer mug for the coffee ritual that powers every session. And hang a geek wall art tech poster that makes your home office or studio background as interesting as your laptop lid.
One developer identity. Every element of your environment expressing it consistently.
Conclusion – Your First Sticker Is Just the Beginning
Every impressive developer sticker collection you’ve ever admired started exactly where you are now, with a blank lid, some questions, and the decision to start.
The developers with the most interesting laptop lids aren’t the ones who bought the most stickers or found the rarest ones first. They’re the ones who started with intention, added gradually and thoughtfully, participated in the communities that generate the most meaningful pieces, and let their collection evolve honestly as they evolved as developers.
That journey starts with your first three stickers. Choose them deliberately. Apply them carefully. And then let the rest unfold naturally as you go deeper into the craft and the community.
Your laptop lid is one of the most visible expressions of who you are as a developer. Start building it like you mean it.
Frequently Asked Questions
What are the best first laptop stickers for a beginner programmer?
Start with three: your primary programming language logo, one developer humor sticker that genuinely makes you laugh, and one tool or framework badge representing something you use daily. This three-sticker foundation communicates technical identity, personality, and community membership simultaneously- the three things the best developer sticker collections do. TechGeeksApparel’s programmer sticker packs are a strong quality starting point for the humor and culture pieces.
How do I put stickers on my laptop without ruining it?
The key steps: clean the surface with isopropyl alcohol and let it dry completely, plan your layout before peeling any backing, apply at room temperature, press from center outward using a credit card, pay special attention to edges, and allow an hour of curing time after application. Never cover ventilation slots. Our complete guide on whether stickers are safe for laptops covers every safety detail in depth.
How many stickers should a beginner start with?
Three. Starting with three forces deliberate choices and gives you a foundation to build on gradually. The most common beginner mistake is buying too many at once and applying them hastily; the result is a chaotic layout that doesn’t reflect any intentional aesthetic. Three stickers, applied thoughtfully, look better than thirty stickers applied without a plan.
What is the best way to plan a laptop sticker layout as a beginner?
Use the anchor-first method: identify your most significant sticker as an anchor, place it in a visually strong position, build outward from there, vary sticker sizes for visual rhythm, leave deliberate negative space, and photograph the arrangement on a flat surface before committing to anything. Aim for 50–70% lid coverage rather than filling every inch. For more layout and design inspiration, our post on laptop sticker ideas for programmers covers 50+ specific design directions organized by category.
Where is the best place to buy computer laptop stickers as a beginner?
Start with specialist developer gear stores that clearly specify vinyl material and have quality control, TechGeeksApparel’s programmer sticker collection is purpose-built for developers with weatherproof vinyl and authentic coding culture designs. Official project stores (Python Software Foundation, Rust Foundation) are the best source for authentic language logos. Etsy is great for unique designs once you know how to vet seller quality; look for 4.8+ ratings and specific mentions of print durability in reviews. Our complete guide on where to get the best laptop stickers covers every sourcing option across all price ranges.
![A clean flat lay of nerdy gift ideas under $50, featuring a "World's [0] Programmer" t-shirt, a "I Learned Patience the Hard Way" mug, mechanical keyboard keycaps, and tech-themed books](https://techgeeksapparel.com/wp-content/uploads/2026/06/nerdy-gift-ideas-under-50-programmer-essentials.webp)